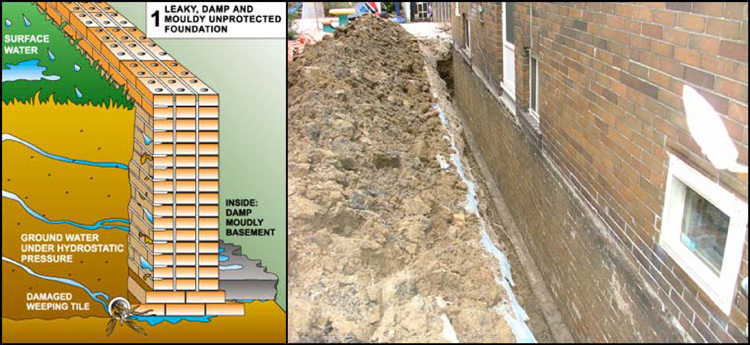
Step 1. Leaky, Damp and Mouldy Unprotected Foundation
The hydrostatic pressure generated by the rising groundwater is the main cause of the cracks appearing in your brick foundation. In time, the surface water infiltrates into the ground around your foundation. Also, a damaged weeping tile doesn’t help either.
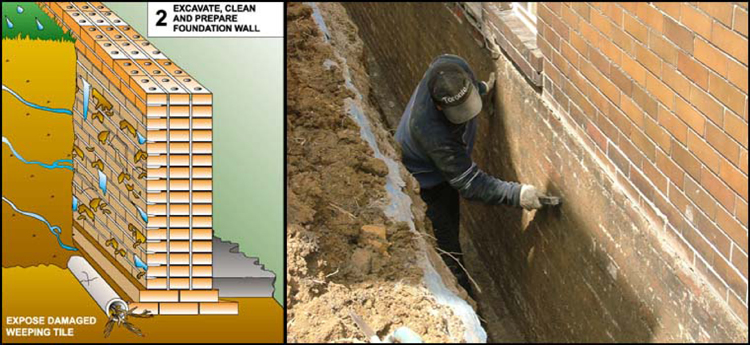
Step 2. Excavate, Clean and Prepare Foundation Wall
The procedure of waterproofing a basement starts with digging up the soil around the house with the use of small excavators and shovels. The unearthed brick wall is then cleaned and examined for damages.
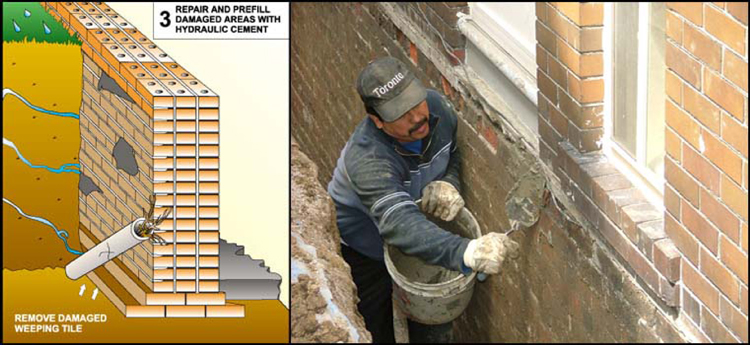
Step 3. Repair and Refill Damaged Areas With Hydraulic Cement
If cracks in the wall are found, and 95% of the time they are, the contractor uses hydraulic cement to fill them up, thanks to its ability to rapidly set, usually around 3 minutes. They clear away the damaged weeping tile as well.
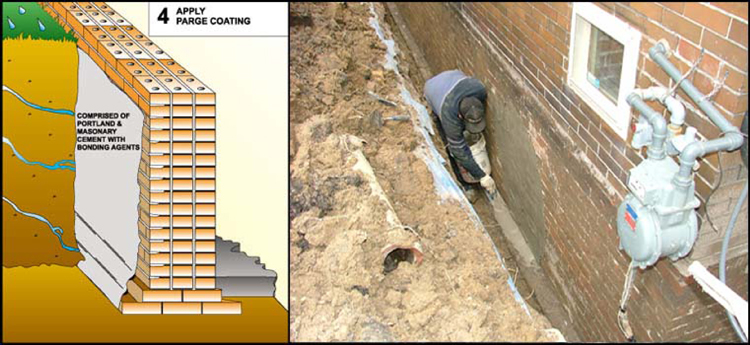
Step 4. Apply Parge Coating
After the deteriorated brick wall is repaired, a parge coat is applied. It’s made of Portland cement with bonding agents and is used to smooth hide imperfections on the surface.
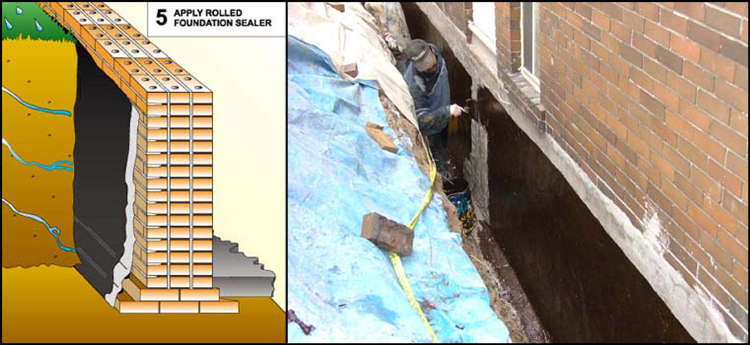
Step 5. Apply Rolled Foundation Sealer
The workers use a long nap roller to apply foundation sealer. It acts as a barrier between the brick foundation, which is naturally porous, able to trap water inside.
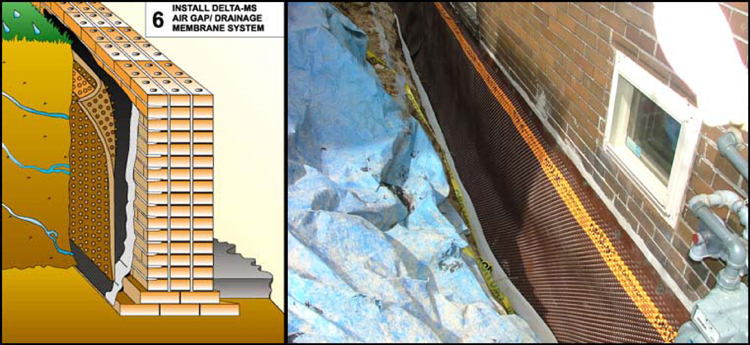
Step 6. Install Delta-MS Air Gap/Drainage Membrane System
The contractor then installs the Delta-MS drainage membrane system. It features a layer of hydrophilic geotextile that efficiently drains the water away.
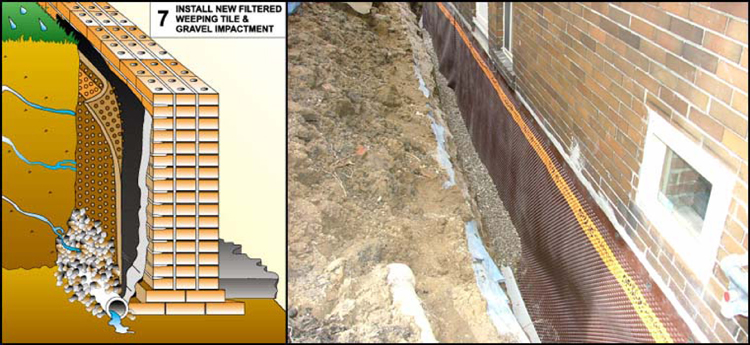
Step 7. Install Filtered Weeping Tile & Gravel Impactment
The new weeping tile is now ready to be installed. Made of high density polyethylene, it’s flexible and tough at the same time, as well as extremely durable.
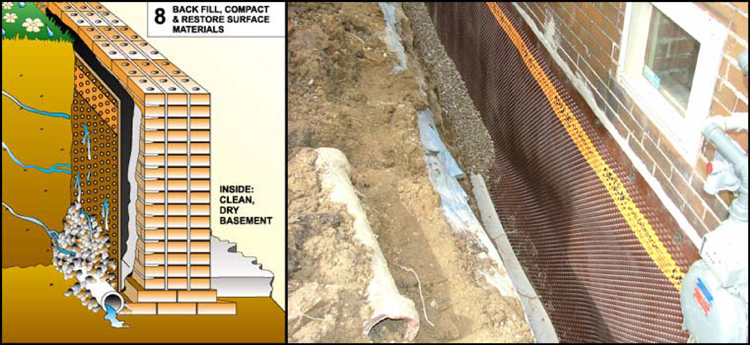
Step 8. Backfill, Compact & Restore Surface Materials
The only thing remaining is to fill up the area around the foundation and to put everything in its place. The client won’t be able to tell the difference, except for the fact that his basement is no longer wet and moldy.
